Toyota Corolla: Do-it-yourself maintenance / Air conditioning filter
The air conditioning filter must be changed regularly to maintain air conditioning efficiency.
Removing the air conditioning filter
1 Turn the engine switch off.
2 Open the glove box. Slide off the damper (if equipped).

3 Push in the glove box on the vehicle’s outer side to disconnect the claws. Then pull out the glove box and disconnect the lower claws.

4 Unlock the filter cover (A), pull the filter cover out of the claws (B), and remove the filter cover.

5 Remove the filter case.

6 Remove the air conditioning filter from the filter case and replace it with a new one.
The “ UP” marks shown on the filter
and the filter case should be pointing up.

■ Checking interval
Replace the air conditioning filter according to the maintenance schedule. In dusty areas or areas with heavy traffic flow, early replacereplacement may be required. (For scheduled maintenance information, please refer to the “Scheduled Maintenance Guide” or “Owner’s Manual Supplement”.)
■ If air flow from the vents decreases dramatically
The filter may be clogged. Check the filter and replace if necessary.
NOTICE
■When using the air conditioning system
Make sure that a filter is always installed. Using the air conditioning system without a filter may cause damage to the system.
■To prevent damage to the filter cover
When moving the filter cover in the direction of arrow to release the fitting, pay attention not to apply excessive force to the claws. Otherwise, the claws may be damaged.

 Wheels
If a wheel is bent, cracked or heavily corroded, it should be replaced. Otherwise,
the tire may separate from the wheel or cause a loss of handling control...
 Wireless remote control/ electronic key battery
Replace the battery with a new one if it is depleted. As the key may be damaged
if the following procedure is not performed properly, it is recommended that key
battery replacement be performed by your Toyota dealer...
Other information:
Toyota Corolla 2019-2025 Owners Manual: Turning the high beams on/off manually
■ Switching to the low beams Pull the lever to its original position. The Automatic High Beam indicator will turn off. Push the lever away from you to activate the Automatic High Beam system again. ■ Switching to the high beams Press the Automatic High Beam switch...
Toyota Corolla 2019-2025 Owners Manual: Adding the washer fluid
Add washer fluid in the following situations: A washer does not work. The warning message appears on the multi-information display. NOTICE ■ Do not use any fluid other than washer fluid Do not use soapy water or engine antifreeze instead of washer fluid...
Categories
- Manuals Home
- 12th Generation Corolla Owners Manual
- Wireless charger
- Operating HomeLink
- Lubrication system (2.0 L 4-cylinder [M20A-FKS] engine)
- New on site
- Most important about car
General settings
Settings are available for clock, operation sounds, etc.
Displaying the general settings screen
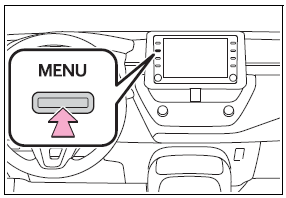
1 Press the “MENU” button.

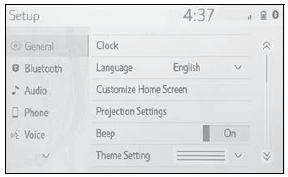
2 Select “Setup”.
If the general settings screen is not displayed, select “General”.
3 Select the desired items to be set.

